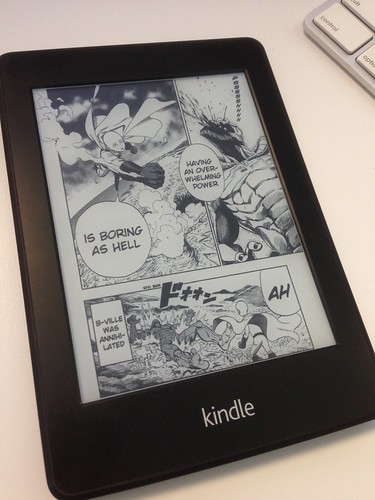
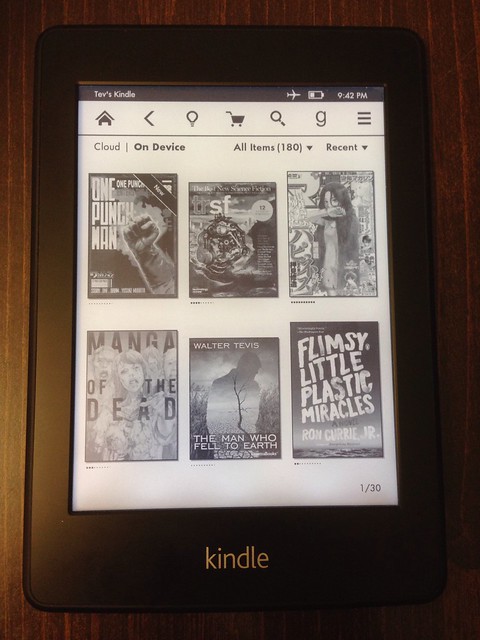
OnePunch Man Scanlation on Kindle
Step-by-Step
Here’s a quick guide to putting free Manga on a Kindle.
Step 1. Download the software
MangaScraper – for grabbing images from free online scanlation (fan translation)Â manga sites. Unfortunately this is only available for Windows. If you know a Mac version, let me know!
Kindle Comic Converter – for converting the images to Kindle size and saving a Kindle-compatible .mobi file.
You will also need to download KindleGen and copy it to the Kindle Comic Converter folder once it’s installed.
Calibre – optional, if you want to add a cover image.
Step 2. Grab some Manga
MangaScaper will automatically grab images from the following sites:
bato.to, EatManga.com, EGScans.com, MangaFox.me, MangaReader.net, MangaStream, Vortex-Scans, Red Hawk Scans
Browse one of those sites and find something you like. For this example I will use OnePunch Man from EatManga.com.
Open up MangaScraper, select the source site, and type the name of the series. MangaScraper will show matching results, select the one you want and it will then show available chapters below.
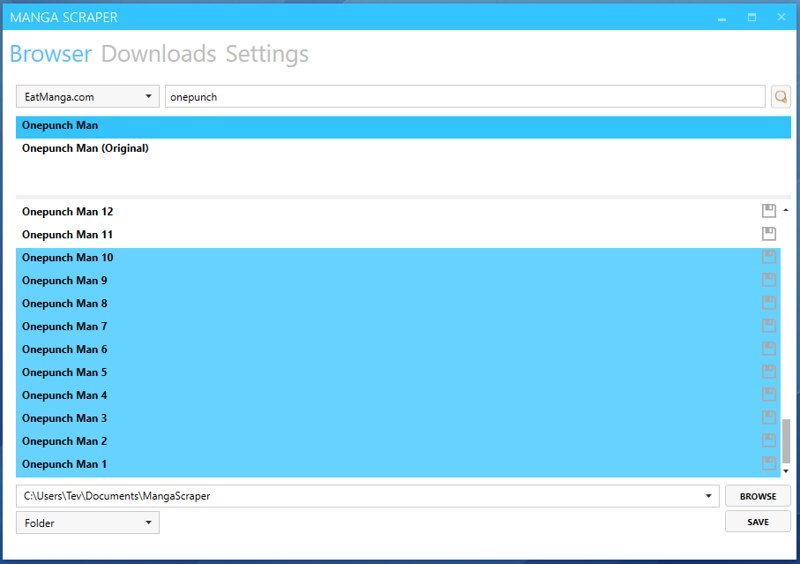
It’s a good idea not to make ebooks too big so the Kindle can handle them. I like about 10 chapters per ebook.
Select the chapters you want (in this example, I’ve selected 1-10), set a target location to save, choose “Folder” as the output, and hit “Save”. An arrow in the upper right will flash for a while as it downloads. Once it’s complete, we’re ready for the next step.
Step 3. Compress
Make a new folder with an appropriate name (in this case, I called the folder “Onepunch_Man_01-10”) then put the folders you just downloaded inside.
Zip the folder. On Mac, right-click and choose “Compress”, on Windows, right-click and choose “Send to > Compressed Folder”.
Step 4. Convert to Kindle
Open Kindle Comic Converter, and drag the .zip file to it.
Choose your target device (Kindle PW 1/2, in my case).
Check “Manga mode” – this will make the ebook pages turn right to left, like the original manga – so instead of tapping the right edge of the screen to go to the next page, you tap the left edge. It will also ensure that 2-page spreads are shown in the correct order.  If you prefer turning pages the Western way, you can leave it unchecked.
Hit “Convert”.
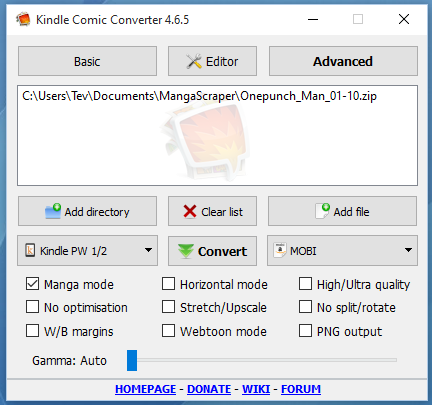
A .mobi file will be generated (it will generate an .epub file and then convert that to .mobi).
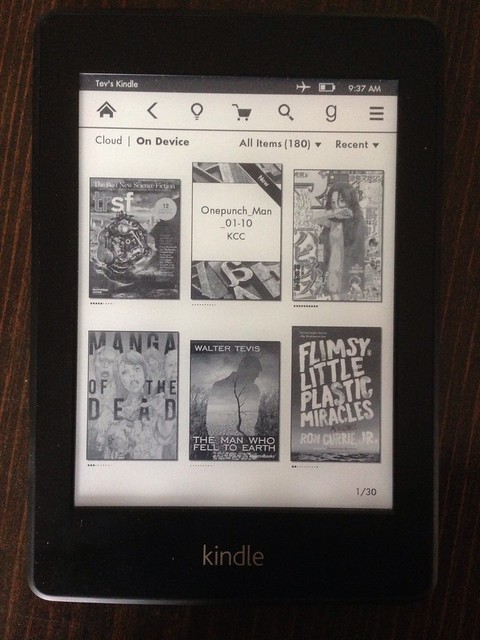
Connect your Kindle to your computer with a USB cable, copy the file over to your Kindle’s documents folder.
You’re done!
Step 5. (optional) Add a cover image
The only flaw with Kindle Comic Converter is it doesn’t create a cover image (it does create one, but Kindle doesn’t read it correctly). If that’s important to you, you can take the extra step to add one with Calibre. Â Calibre is a super-useful ebook library manager, so you can also use it to organize your manga ebooks. It’s overkill for just adding a cover image, but here’s how.
Open Calibre, choose Amazon Kindle Paperwhite (or your device) as the default device. Create a new library with the name and location you want.
Drag the .mobi file you generated to Calibre. It will add a copy to your library. Select the book from the list in Calibre, choose “Edit Metadata” (the big “i” icon in the menu). Drag the image you would like to use to the cover image area and hit “Ok”.
Plug your Kindle in and it will show up in Calibre. Right-click the ebook in the Calibre list and choose “Send to device”. It will show a status in the lower right, when it completes, you can choose “Eject this device” from the device in the top menu.
You’re done!
That’s it, get to reading!